
On daily basis, we scan hundreds of thousands of websites using Optimizers.IO, 3 of 5 analysed websites doesn’t contain a valid SSL certificate. This already impacts badly the site online presence.
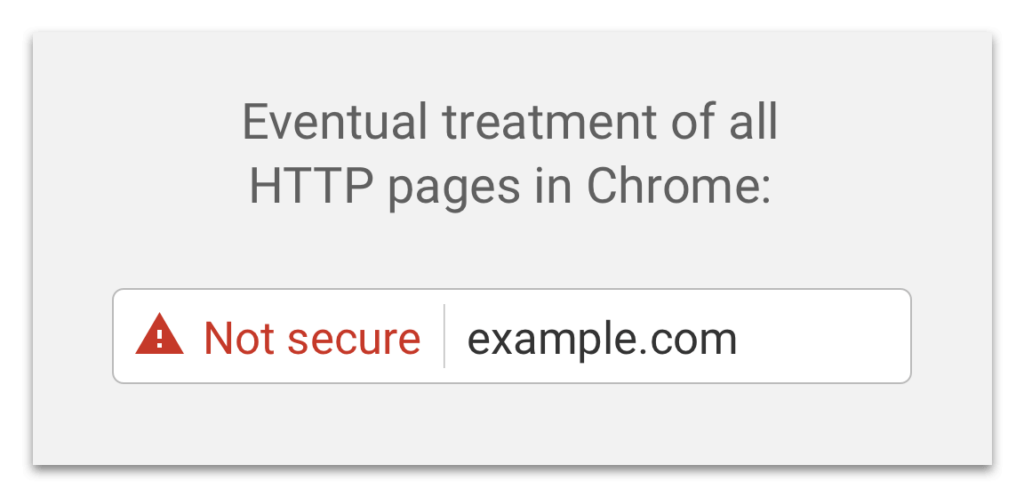
In July 2018, Google released the Chrome version 68 with the “Not Secure” feature, marking any website without a valid SSL certificate as not secure for browsing, and as today Google chrome already represents 69.28% of the browsers market share.
Let’s Encrypt Authority
Launched in April 2016, the Internet Security Research Group (ISRG) and as a part of the Linux Foundation projects. Let’s Encrypt came with a clear goal in mind : Secure the web.
The project is backed by some great principles :
- Free : You can request and use a Let’s Encrypt trusted certificate for free.
- Automatic : Using the API, automate the process of obtaining, and renewing the SSL certificate.
- Security : Implementing the best TLS security practices, test it in ssllabs.com to see.
- Transparent : You can publicly check the records of certificate issued / revoked, check the stats as well : https://letsencrypt.org/stats/
- Open : Automatic Certificate Management Environment (ACME) is backed by amazing contributor, the RFC is publicly available : https://tools.ietf.org/html/rfc8555
- Cooperative : As stated before, it is a huge collaborative effort behind Let’s Encrypt thriving progress.
Step 1 – Certbot Utility
Certbot is a free and open source tool created by the Electronic Frontier Foundation (EFF) in order to request, renew Let’s Encrypt certificate in an easy straightforward way.
We will cover in this guide the installation in Ubuntu 18.04 and CentOS/RHEL 8, in case your OS is not covered; you can easily get the appropriate command from Certbot instructions page : https://certbot.eff.org/instructions
First, be sure that Certbot is not installed using any other package management tool like apt, or yum…
Ubuntu 18.04
sudo dnf remove certbotCentos/RHEL 8
sudo yum remove certbotsnapd Installation
Ubuntu 18.04
In bionic, snapd comes pre-installed, we just need it to be at its latest release, and up to date
sudo snap install core; sudo snap refresh coreCentos/RHEL 8
sudo dnf install epel-release
sudo dnf upgrade

# Install snapd
sudo yum install snapd
sudo systemctl enable --now snapd.socket

# Enable snapd classic support
sudo ln -s /var/lib/snapd/snap /snap
Now, you can restart your session to ensure that snapd binary location is added to the $PATH
Certbot Installation & Configuration
Its straightforward now to install certbot, in both OS run the following commands :
# Install certbot using snap
sudo snap install --classic certbot

# Create a symbolic link to snap's certbot
sudo ln -s /snap/bin/certbot /usr/bin/certbot
All SSL certificates will work in any web server, but certbot helps us to place the certificate files in the appropriate folder, and modify the web server configuration automatically.
If you are using Nginx follow the guide in Step 2, for Apache you can skip ahead to Step 3.
Step 2 – SSL Certificate for Nginx
The following command will generate the certificate, and modify our Nginx files automatically.
sudo certbot --nginx -d example.com -d www.example.comWe can as well tell certbot to give us the certificate files only without any configuration change, we will do it manually later.
# This will generate only the SSL certificate
# Replace example.com by the desired domain name
sudo certbot certonly --nginx -d example.com -d www.example.com
The certificate files are going to be available in the following path as the files :
# You can check the nature of the files using
file /etc/letsencrypt/live/example.com/fullchain.pem
file /etc/letsencrypt/live/example.com/privkey.pem
In the case of the certonly mode we might need to specify the certificate and private key path inside the site Nginx configuration file.
sudo vi /etc/nginx/sites-available/example.comAdd the Nginx server directive to listen to the port 443 and using the Let’s Encrypt certificate.
server {
listen 443;
ssl on;
ssl_certificate /etc/letsencrypt/live/example.com/fullchain.pem;
ssl_certificate_key /etc/letsencrypt/live/example.com/privkey.pem;
root /var/www/html;
server_name example.com www.example.com;
}
Step 3 – SSL Certificate for Apache
The following command will generate the certificate, and modify our Apache files automatically.
sudo certbot --apache -d example.com -d www.example.comWe can as well tell certbot to give us the certificate files only without any configuration change, we will do it manually later.
# This will generate only the SSL certificate
# Replace example.com by the desired domain name
sudo certbot certonly --apache -d example.com -d www.example.com
The certificate files are going to be available in the following path as the files :
# You can check the nature of the files using
file /etc/letsencrypt/live/example.com/fullchain.pem
file /etc/letsencrypt/live/example.com/privkey.pem
In the case of the certonly mode we might need to specify the certificate and private key path inside the site apache configuration file.
sudo vi /etc/apache2/sites-available/example.comAdd the Virtual host directive to listen to the port 443 and using the Let’s Encrypt certificate.
<VirtualHost *:443>
        ServerName example.com
        ServerAdmin [email protected]
        DocumentRoot /var/www/html

        ErrorLog /var/log/example.com-error.log
        CustomLog /var/log/example.com-access.log combined

        SSLEngine On
        SSLCertificateFile /etc/letsencrypt/live/example.com/fullchain.pem
        SSLCertificateKeyFile /etc/letsencrypt/live/example.com/privkey.pem

        Header always set Strict-Transport-Security "max-age=15768000"

        RequestHeader append "X-Forwarded-Proto" "https"
        RequestHeader set "X-Forwarded-Ssl" "on"
</VirtualHost>
Step 4 – SSL Certificate Auto Renewal
You can test in a dry-run mode if Certbot can execute the renewal process by executing the command :
sudo certbot renew --dry-runIf it works as expected, then let’s configure a cronjob, this depends on which web server we are using.
I will use here crontab -e to execute the renew command every 12 hours.
Nginx
0 */12 * * * certbot renew --quiet --renew-hook "service nginx reload"Apache
0 */12 * * * certbot renew --quiet --renew-hook "service apache2 reload"SSL Labs provides online a free tool to test the SSL certificate, go ahead and try it : https://www.ssllabs.com/ssltest/
Et Voila! Your website is now using an auto renewed SSL certificate Thanks to Let’s Encrypt and Certbot.

0 Comments